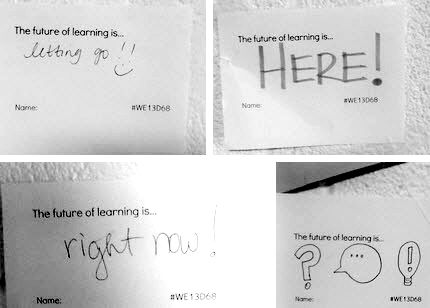
In a perfect world, it would be great to be able to do all of these steps. However, you don't have to do all of this when it comes to just getting kids to stop and think. When I asked the teachers what strategy they can walk away with and implement immediately, the top-two take-aways for the 2nd year teachers seemed to be one low-tech reflection strategy and one high-tech: the "Where Was I, Where Am I, Where Am I Going" post-it activity and the "One Minute Video Reflection". As I continue to share this information with teachers, I impress upon them that although this 4-day lesson went incredibly smooth, the format may not work for everyone. Instead, I ask teachers to again consider any strategy that they can transfer into their instruction in a way that they see fit. Here's a list of high and low tech related reflection strategies to use when students are completing mini-research/inquiry/PBL activities:
Showing posts with label Inquiry. Show all posts
Wednesday, March 19, 2014
Infusing High & Low Tech Strategies with Student Reflection and Feedback
Posted by
Tarah Tesmer
|
7:22 AM
|
Design Thinking,
EdTech,
Feedback,
Genius Hour,
Inquiry,
Metacognition,
Project Based Learning,
Reflection
|
1 comments |
Wednesday, February 12, 2014
Overcoming the Digital Divide Part 1: The Google Search

Kids come to school with with an arsenal of knowledge on how to retrieve information off of the internet, and now they can do it as fast as asking "Siri, when was the Declaration of Independence signed?" to "Okay Google, how fast an a cheetah run?" When it comes to conducting inquiry studies in the classroom, a students first rule of thumb to ask the internet a question does not always provide them with the best, most reliable sources.
Here are 3 tips to get students to "get more out of Google".
Discover advanced search techniques. You can use keyboard shortcuts and other advanced operators to get specific results as you search (i.e.: use key words, truncation, limit phrasing, file-type search, etc.) See the presentation slideshow below! Infographic originally from an article on Mashable.
I'd also recommend taking a look at these two blog posts:
5 steps to more accurate and efficient Google search
10 (more) awesome things Google Search can do for you
Friday, January 10, 2014
Communicating Visually with ThingLink and Lucidchart
Posted by
Tarah Tesmer
|
7:27 AM
|
Connected Educator,
EdTech,
Google Apps,
Inquiry,
Mind Map,
Presentation Strategies,
Tech Integration
|
0 comments |
I had a great time yesterday chatting with two teachers, Melissa Barron and Leslie Loboda, and we were mustering around ideas on better tools for annotating texts and images online. With Diigo already something many teachers and students are accustomed to (see my previous post on Diigo here), we talked instead about ThingLink and LucidChart for visual communication tools. In addition, due to the fact that we decided not to renew our district subscription to Glogster for this year, these are great free tools that can supplement similar experiences for our students.
ThingLink allows users to add media-rich content and text to image files. It's somewhat like Facebook tagged-images meets storytelling and annotating as images come alive with music, text, video, images, hyperlinks, etc. It is extremely intuitive to use. Students can create and explore advertisements, time periods, vocabulary, authors and other topics by creating media bundles on one collective image. Here is a brief intro to ThingLink as well as 26+ strategies on how to use it in the classroom.
Note: If you're a teacher or student, you can upgrade your account to Education; it’s FREE. If a student is under the age of 13, a teacher, parent or legal guardian must provide consent for the child to use ThingLink.
A Brief Look at ThingLink
26+ Ways to use ThingLink (by Donna Baumbach)
Here's a sample
Lucidcharts is a common tool that Melissa uses with her 7th and 8th grade science classes as a shareable and interactive brainstorming, annotating, diagramming/flowchart tool. Lucidcharts integrates instantly with Google Drive, and for students and teachers that are already accustomed to the sharing/editing aspect that goes on within Google Drive, using Lucidcharts will seem very familiar. Simply sign up for a free account with your Google (D68 teachers - your email is a Gmail account) and then head on over to the Chrome Web Store and download the Chrome App, also free. Once you have an account, be sure to do the free K-12 education upgrade!
Link: 10 ways to use Lucidcharts in the classroom
A Brief Look at Lucidcharts integration with Google (disregard the portion on Visio docs)
Here's a sample of a Lucidchart that D68 new teachers worked on together
Thursday, December 19, 2013
Presentation Formats that Light Up 21st Century Thinkers
Posted by
Tarah Tesmer
|
11:25 AM
|
Inquiry,
Mindset,
Presentation Strategies,
Tech Integration,
Twitter
|
0 comments |
With dozens upon dozens of presentation tools and strategies out there, here are a few tips along with some "hidden gems" that allow students to gain control of their learning experience and coast students into avoiding dull, text-rich presentations.
Letting go of control & honoring choiceFor a unit 2 classroom assessment, 8th grade language arts teacher Di Ander found the learning outcomes for her students to be incredibly successful after giving students the reigns to control their learning experience. The students are given an assessment known as a Real World Experience in which they had to persuade others to support their Not for Profit organization financially. All kids received 5,000 fake dollars to donate to a charity of their choice and present their ideas to their peers. The students were all about integrating technology to have a more powerful 1-2 minute presentation and were very curious of their options on what they could use.
The current teaching and learning shift we are experiencing that places the role of the student at the center of the learning experience is reshaping relationships between teachers and students. Something that we all accept as a known fact is that the person who does the work does the learning. Today's students need to be given an opportunity that takes their own work a step further. True ownership in learning goes beyond just "doing the work". Let your students do more learning by providing them with the tools and steps they need to take to be successful, but find a way to honor their choice at the same time. Choice in note-taking strategy. Choice in collaboration/communication outlet. Choice in presentation tool.
"Students need to become contributors to their work. Shift from the teacher at the center of curriculum, designing tests, to the network of children who are helping one another learn" (Alan November).Set your vision, set your goals and parameters, give the students a learning target, and allow them the opportunity to discover how they can accomplish it. Allow students to seek out their own learning.
Di Ander's class at work.
Communicating Effectively: Less is more
Although the style/tool used for student presentations were open to allow for student choice, the vision that Di had in place for the format of presenting was clear. The students were to follow Pechu Kucha 20x20 - a "simple presentation format where you show 20 images, each for 20 seconds. The images advance automatically and you talk along to the images" (http://www.pechakucha.org/), or in Di's students' case, 10 images for 20 seconds a piece. Popular tech-tool students chose for their outlet of accomplishing this included Google Presentation, Prezi, and the newly launched (but still in Beta format) Haiku Deck.
Even though full-class presentations for the most part are becoming less mandatory after an inquiry project than before, it all still depends on what you want students to get out of their learning experience. In the case of Di's class, not only were they set to master a set of skills/specific standards, they also were coaching one another on how to present information in an effective and engaging matter. In a sense, they needed to learn how to present to get audience members to care - to see why something they care about matters.
There's a great article called the Latest Annoying PowerPoint Survey Results that details how presentations become annoying, uneffective, and pretty much and overall bore for audience members. Here's a few take-away items they found:
- The speaker read the slides to us
- Text so small I couldn't read it
- Full sentences instead of bullet points
- Overly complex diagrams
- Poor color choice
- No clear purpose
- No flow of ideas
Catherine Carr of Haiku Deck created the following presentation on how PowerPoints go bad
I implore you all to check out Haiku Deck. It'll change your world AND
forever change the way you present information!
Share the awesome learning
If you're doing some awesome learning and you're not sharing, it's selfish. Share your #eduwins with fellow educators in your building or share the wins on social media. Increase traffic to student-centered posts on Twitter by adding #comment4kids. Either way, share the successes (and share failures... you'd be so surprised to see the amount of incredible educator-strangers that will come to your rescue on Twitter if you ask for help!). Imagine the learning experience for the student who not only just presented on a topic they were passionate about in a way that makes sense for them, but then add on that educators can learn from the experiences of that student online.
Here's an example of Di sharing her eduwins with the outside world. Note that the student chose to present without notecards and instead used his cell phone as his springboard for notes!
Happy learning!
Monday, September 23, 2013
How to Research Within a Google Doc
Here's a silent screen-cast video on researching within a Google Document. Once students have opened a Google Doc, they can research within it by clicking on Tools > Research. Then, a Google Search window should appear on the right side of the screen.
Students can...
Read More
Students can...
- Preview websites
- Browse through images and drag/drop them onto the document
- Insert links of webpages
- Cite sources with an automatic citation creator
...all while working on one page!
Note: D68 staff members, you can access the video during the day by clicking on the link at the beginning of this post.
Subscribe to:
Posts (Atom)
Powered by Blogger.